

A chemical peel is one of the most trusted treatments for restoring smoother, brighter, and younger-looking skin. Exfoliating damaged layers helps reduce wrinkles, fade dark spots, and improve overall texture. But what really happens once you book your appointment?
Is it just about peeling skin, or is there more to the process? Understanding what to expect before, during, and after a chemical peel will help you feel confident, prepared, and excited about the transformation ahead.
Key Takeaways
- Chemical peels improve texture and skin tone.
- Peel depth determines downtime and visible results.
- Proper aftercare ensures safer, lasting improvements.
- Alternatives include microneedling and advanced facials.
- Not all candidates are peel-suitable.
What to Know Before a Chemical Peel
Preparing for your treatment is just as important as the peel itself. A proper consultation and following pre-care instructions will ensure safer, more effective results.
Consultation & Skin Assessment
The first step is meeting with a skincare professional. During the consultation, your esthetician or dermatologist will evaluate your skin type, current concerns, and medical history. This ensures the peel is both safe and effective.
Choosing the Right Peel Strength
Not all chemical peels are the same. They vary in depth and results. Here’s a quick breakdown:
| Peel Type | Depth | Best For | Downtime |
|---|---|---|---|
| Light Peel | Superficial | Uneven texture, dull skin, mild acne | 1–2 days |
| Medium Peel | Mid-depth | Wrinkles, sun damage, pigmentation | 5–7 days |
| Deep Peel | Intense | Severe wrinkles, scars, long-term damage | 2–3 weeks |
Pre-Treatment Guidelines
Before your appointment, there are a few important steps to take. These help your skin respond better to the peel and minimise side effects.
- Avoid sun exposure and tanning beds at least two weeks prior.
- Stop strong skincare products (like retinol or exfoliants) one week before.
- Share any allergies, medications, or recent treatments to avoid complications.
What Happens During the Procedure
Many first-timers wonder what actually happens in the treatment room. The process is simple, safe, and usually takes less than an hour.
Step 1: Skin Cleansing & Prep
Before the peel begins, your provider will carefully cleanse your skin to remove surface impurities such as dirt, excess oil, and makeup. This step may seem simple, but it is crucial for the success of the procedure. A clean surface allows the chemical solution to penetrate evenly, preventing patchy results—just as treatments like Exosome Microneedling require a well-prepped surface for optimal effectiveness.
In many cases, a mild degreasing solution or alcohol-based cleanser is also used to strip away any remaining oil that could block absorption. This prep step ensures your skin is in its purest state, giving the peel the best chance to work effectively and deliver smoother results.
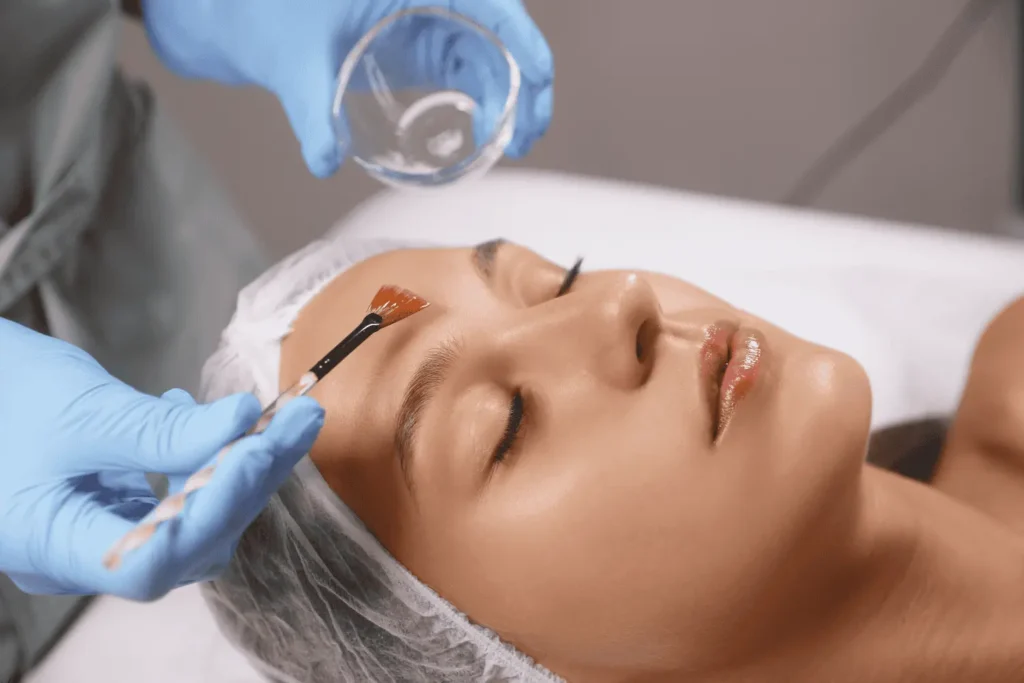
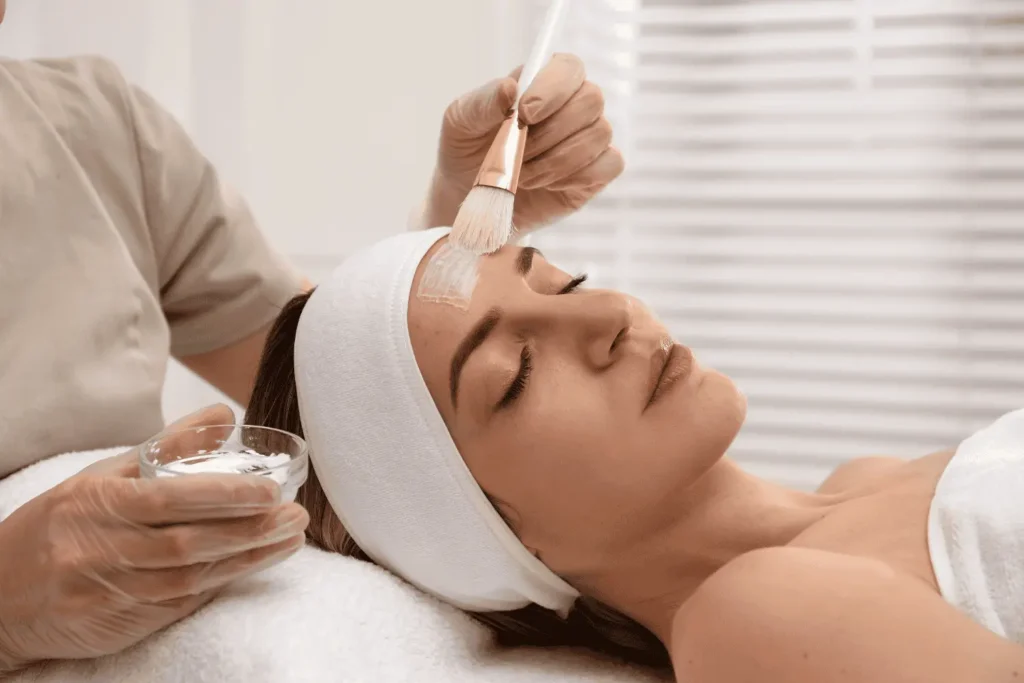
Step 2: Application of Chemical Solution
Once your skin is fully prepped, the chosen chemical solution is applied. Depending on your skin type and goals, this could be a light alpha-hydroxy acid like glycolic or lactic acid, a stronger beta-hydroxy acid such as salicylic acid, or a more intensive option like trichloroacetic acid (TCA).
The solution is spread evenly across your face, often starting with the forehead, cheeks, and chin. Application time can vary from a few minutes to longer, depending on peel strength. During this phase, your provider closely monitors your skin’s response to ensure safety and effectiveness, adjusting if necessary—much like how RF Microneedling treatments are carefully guided to deliver optimal results.
Step 3: Tingling & Peeling Sensation
As the chemical solution interacts with your skin, you’ll likely notice a tingling or stinging sensation. This reaction is a normal sign that the acids are breaking down damaged surface layers and stimulating cell turnover. Some describe it as warmth, while others compare it to a mild sunburn-like feeling.
The intensity of this sensation depends on the strength of the peel: lighter peels feel mild, while medium and deep peels are stronger and may be slightly uncomfortable. Your provider may use a fan or cooling device to ease the feeling. The sensation typically subsides within minutes.
Step 4: Neutralization & Aftercare Instructions
After the chemical solution has worked for the intended time, your provider neutralizes it to stop the exfoliation process. This is an important step, as it prevents the acids from penetrating too deeply and ensures your skin begins healing correctly. The neutralisation is followed by the application of soothing products, such as calming serums, cooling masks, or hydrating moisturizers, to reduce redness and irritation.
Finally, you’ll receive detailed aftercare instructions, including what skincare products to avoid, how to protect your skin from sun exposure, and when to expect peeling. Proper aftercare is essential for achieving safe, long-lasting results.
What to Expect After a Chemical Peel
The healing process is when the magic happens. While results vary by peel strength, most people notice fresher, smoother skin within days.
Immediate Recovery (Day 1–3)
In the first few days after a chemical peel, your skin will likely appear red and feel tight, much like a mild sunburn. This is a normal reaction as the outermost layer begins to break down. Sensitivity is common, so it’s important to avoid touching or picking at your skin, even if it feels dry or itchy.
Light peeling or flaking usually starts within 48 hours, though the exact timing depends on the strength of the peel. During this period, hydration and sun protection are critical. Using a gentle moisturizer and applying sunscreen daily will help minimize irritation and protect healing skin.
Short-Term Results (1–2 Weeks)
As you move into the first week after treatment, the most noticeable peeling will begin to subside. Your skin may shed in small flakes or larger sheets, revealing new, healthier skin beneath. This stage often brings the first visible improvements: a smoother surface, more even tone, and a natural glow that was hidden by dull or damaged skin. Redness typically fades, though some sensitivity may linger.
By the end of the second week, most patients feel confident returning to their regular skincare routines, provided they continue to avoid harsh products and prioritize hydration. This is when the transformation becomes truly noticeable.
Long-Term Results (1–3 Months)
The benefits of a chemical peel don’t stop after the peeling phase ends—they continue to build over several weeks. As your skin heals, collagen production increases, helping to smooth fine lines and soften wrinkles. Acne scars may appear less visible, and areas of hyperpigmentation often lighten significantly. With consistent sun protection and gentle skincare, results can last for months.
Many patients notice that their skin feels firmer and looks brighter than before, creating a more youthful appearance overall. For deeper peels, improvements may continue to develop for three months or more, offering long-lasting enhancement to both skin health and confidence.
Downtime Differences
The depth of your peel will determine recovery time. Some peels barely disrupt your routine, while others require more patience.
- Light Peel: Minimal peeling, back to routine in a day or two.
- Medium Peel: Visible peeling, about a week of healing.
- Deep Peel: Strong peeling and redness, recovery of 2–3 weeks but dramatic results.
Aftercare Tips for Best Results
Post-treatment care protects your new skin and ensures lasting improvements. With the right routine, results can be both safer and longer-lasting.
- Protect from the Sun: Apply SPF 30+ daily, even indoors.
- Stay Hydrated: Drink water and use a gentle moisturizer.
- Skip Harsh Products: Avoid scrubs, retinoids, or acids until cleared by your provider.
- Follow Professional Advice: Stick to the routine given during your consultation.
💡 Pro Tip: Always keep your skincare simple after a peel. Think “gentle and protective.” A fragrance-free cleanser, soothing moisturizer, and sunscreen are your best allies for recovery and long-term glow.
Comparing Chemical Peels with Other Treatments
Chemical peels aren’t the only option for skin rejuvenation. Comparing them with microneedling and advanced facials helps patients choose the right path.
- Chemical Peel vs. Microneedling: Peels exfoliate the skin, while microneedling stimulates collagen production by creating micro-injuries.
- Chemical Peel vs. PRP/Exosome Microneedling: Microneedling with PRP or exosomes can enhance healing and boost results, especially for scars and deep wrinkles.
- When to Choose a Peel: If your main concerns are texture, acne, or pigmentation, peels are often the first choice.
A consultation with a professional is the best way to determine which treatment aligns with your goals. For many patients, chemical peels offer the perfect balance of effectiveness, safety, and noticeable results.
Who Should and Shouldn’t Get a Chemical Peel
Not every skincare treatment is right for everyone, and chemical peels are no exception. Understanding who makes a good candidate—and who should avoid them—helps ensure safe, effective results.
Good Candidates:
- Those with fine lines, wrinkles, or sun damage.
- People struggling with acne or mild acne scars.
- Individuals seeking smoother, brighter skin with minimal downtime.
Avoid If You:
- Have open wounds, severe eczema, or psoriasis on the treatment area.
- Are pregnant or breastfeeding.
- Have used certain acne medications (like isotretinoin) recently.
Final Thoughts
A chemical peel is more than just skin exfoliation—it’s a proven way to refresh your complexion, reduce imperfections, and boost confidence. By knowing what to expect before, during, and after the procedure, you’ll feel empowered to make the right choice for your skin.
✨ Ready to reveal healthier, more radiant skin? Book your consultation with KenshoDerm today and discover if a chemical peel is right for you.